A major ingredient to showing support for your team is having the right apparel. In preparation for the United States' big game against England tomorrow, I needed some gear to show my support during the game. However, I didn't want to spend the money on overpriced gear from the team store that everyone else would have. So, I made my own. It started off a lot more ambitious, but as the failures mounted and game day drew closer, I needed a shirt, and quick. Since I'm just beginning in homemade screen printing, I still need to stick to relatively simple designs, so I stuck with the "Don't Tread On Me" design mentioned
here. I'm very happy with the end result, and can't wait to wear it for the game Saturday. Here's the process of how I went about screen printing my own Shirt.
The Goal
Materials (That I used, this isn't standard)
T-shirt (really?)
Fabric Ink/Paint
Speedball Drawing Fluid
Speedball Screen Filler
Speedball 10"x14" Screen (but a quilting hoop and some screen will work fine)
A design/stencil
Squeegee type thing (a real one, a piece of cardboard, whatever works for you)
Cardboard
Matte Acrylic Sealer
Screen Cleaner
Step One
Place the screen over the design, and lightly paint over the design with the drawing fluid in the spots where you want ink to go through. I would say trace the design in pencil first, but I've found that the pencil doesn't exactly wash out, making it inconvenient when using the screen for a second design If you are using a stencil, place the stencil on the screen, and fill in where you want the ink to go though. Allow this to dry.
Step Two
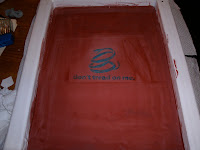
After the drawing fluid has dried, apply a line of screen filler at the top of your screen. Take your squeegee and spread the screen filler over the screen, using as few strokes as possible so the drawing liquid will still wash out. Allow this to dry.
Step Three
After the screen filler has dried, you can wash the drawing liquid out by spraying cold water on it. This will keep the screen filler in tact, but remove the dried drawing liquid. Notice the difference in color from the picture in step two - now ink can go flow through the screen. Hold the screen up to the light and check for any pinholes in the screen filler and fill in any holes you may find. Allow this to dry.
Step Four
Place a piece of cardboard inside your t-shirt, so ink wont run through to the other side of your shirt. Put the design on the shirt where ever you would like to make the print. Place a line of fabric paint above your design, then take the squeegee and spread it over where the design is on the screen, much like you did with the screen filler. Make sure to get good coverage so your design comes through nicely. Remove the screen after you have put the amount of ink you want down by lifting up from the top of the screen. Allow this to dry.
Step Five

After the ink has dried, spray it in a well ventilated room with matte (or glossy, if you so desire) acrylic sealer to protect the ink in the wash. When you go to wash the shirt, wash it inside out just to be on the safe side. If you used a good fabric paint, you shouldn't have to worry about the ink wearing off, but it can't hurt to protect your hard work. Once you're done with that particular design, wash the screen with the screen cleaner and hot water to get it ready to make another design.
And there you have it - you're very own custom, home made shirt. Later on, I will post an alternative method using Mod Podge, eliminating the need for the drawing liquid and screen filler. Now wear your art with pride!


 Posts
Posts

